# 5 Things you Can Do on the Trades Screen
Here's a quick guide to tailoring columns and saving views on the **TRADES** screen, allowing you to focus on the information that matters most to you.
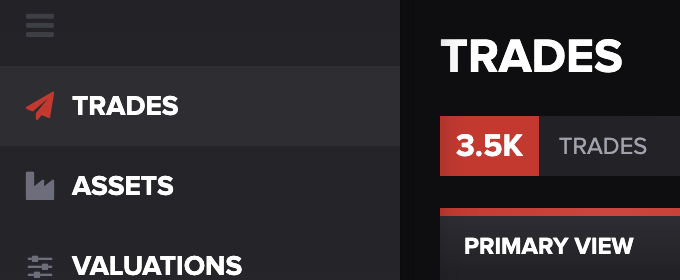
After launching the app, you'll land directly on the **TRADES** screen. Also, you can access this screen any time by selecting **TRADES** from the navigation menu on the left side of the screen.
You can any do any of the following to organize the table to best suit your needs.
#### 1. Filter Trades
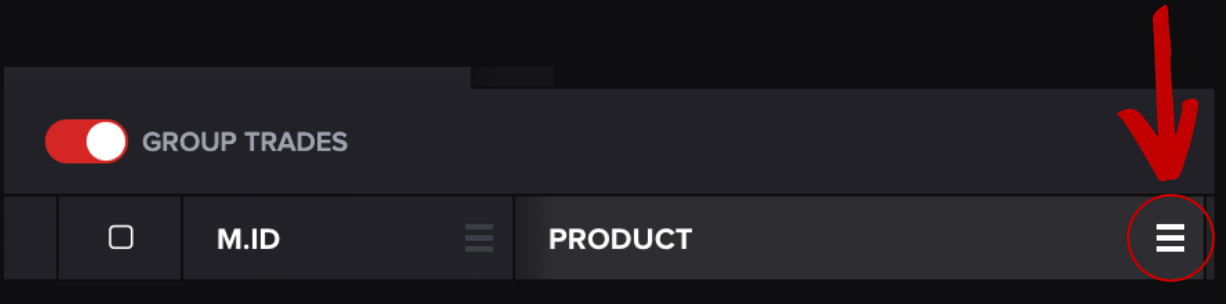
To filter trades, click on the three horizontal lines located in the right-hand corner of any column header you wish to filter. A dialog box appears:
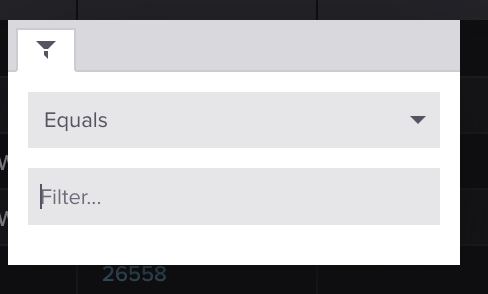
Choose **Equals** or **Contains** from the drop-down and enter your filter criteria into the text field:
Once you've added a filter, the screen will display the filtered results:
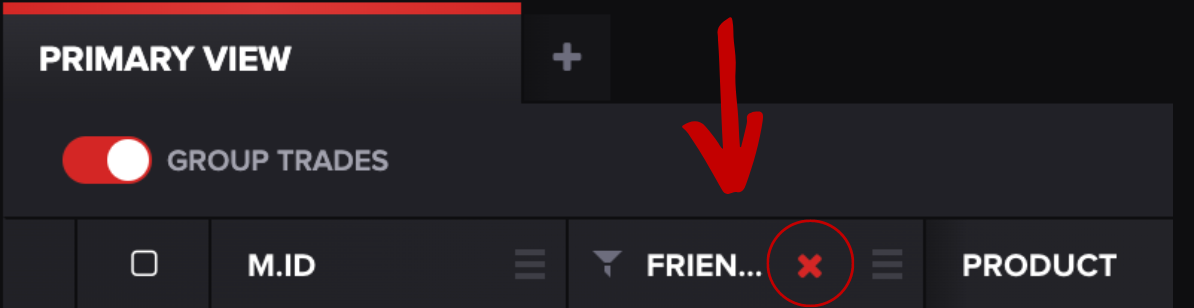
To delete the filter, press the red **X** on the left-hand side of the column.
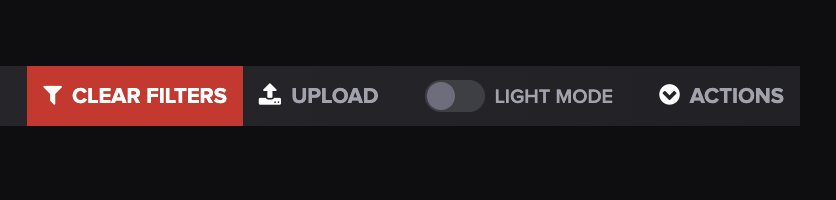
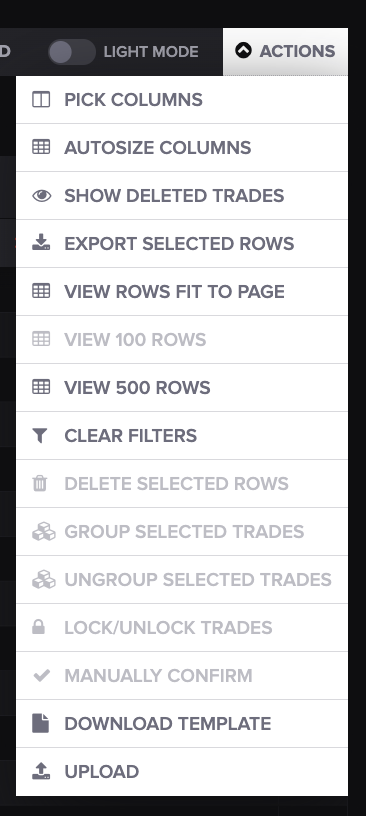
To delete all filters, you can press **CLEAR FILTERS** at the top right-hand side of the screen:
💡 **Tip**: If you're having trouble finding specific trades, double-check that no filters are active.
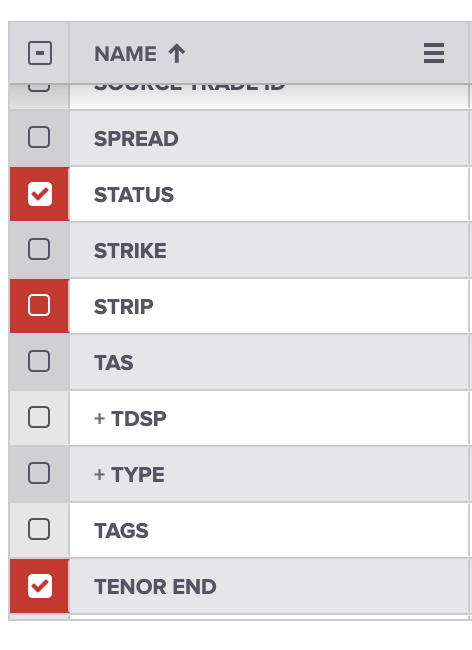
#### 2. Choose Columns
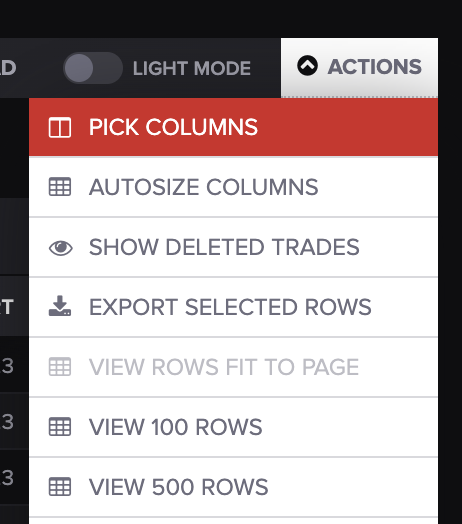
To add or remove columns, select **PICK COLUMNS** from the **ACTIONS** drop-down menu:
#### 3. Drag to Move Columns
To move columns, click and hold the three horizontal lines on the right-hand corner of the column header you wish to move.
Drag it to the desired position and release to drop it in place.
#### 4. Sort Trades
Click on the column header of the attribute by which you wish to sort your trades.
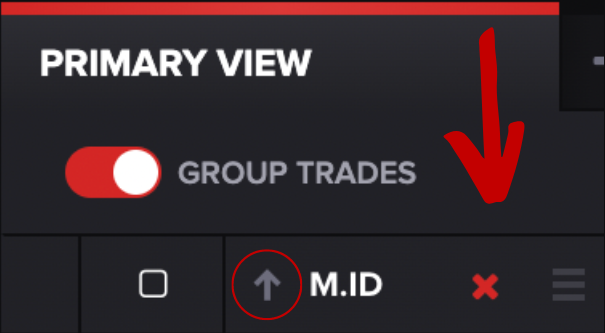
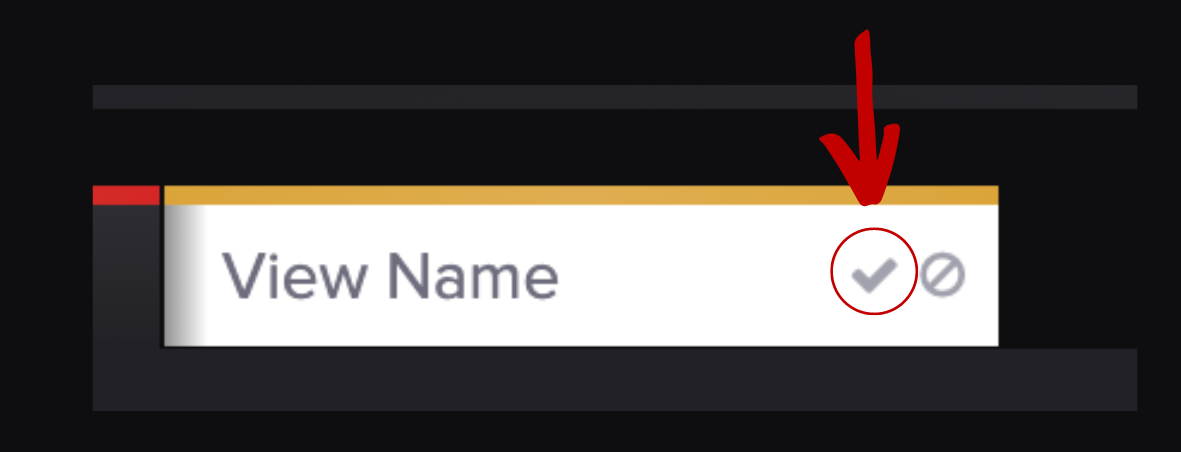
#### 5. Create and Name a Custom View
* Click "**+**" adjacent to the **PRIMARY VIEW** tab.
* Click in the **View Name** box and name your new view.
* Press the checkmark button to save your newly named view.
You can change the view name later by clicking on the pencil icon, or clone your view to create a modified version by clicking on the copy icon. To delete a view, button click the divided circle icon, next to the checkmark icon.
💡 **Tip:** Other actions you can take on this screen are found on the menu bar and by clicking **ACTIONS.**
**Have a question this article wasn’t able to answer?** Reach out to your Customer Success Manager to get the answers you need.