Creating & Managing Custom Fields
Overview
Molecule supports user-defined fields across several core data models. This guide provides step-by-step instructions for setting up and maintaining custom fields while explaining their key features.
Access Requirements
To configure and maintain custom fields, users must:
- Ensure that Custom Field Management is enabled for your account.
- Have the Custom Field Admin role, or belong to a user group with the Custom Field Admin role.
Supported Models
Custom fields can be added to the following data models:
- Agreements
- Assets
- Books
- Counterparties
- Products
- Tickets
- Trades
Creating Custom Fields
Navigate to the Custom Fields page
- Select Settings from the sidebar
- Expand Account Settings. Click on Custom Fields.

Click the + button in the custom fields table header.

Defining Attributes
To get started, configure the following attributes of your custom field.

- Name: Provide a name for the custom field. This is what will be displayed on screens and data extracts.
- Association: Assign the custom field to a specific data model (e.g. Trades, Tickets, etc.)

- Choose the interaction type for users, such as text, dropdown, or boolean.
- If selecting Multiple-Choice, define the options in the Multiple Choice Values field.

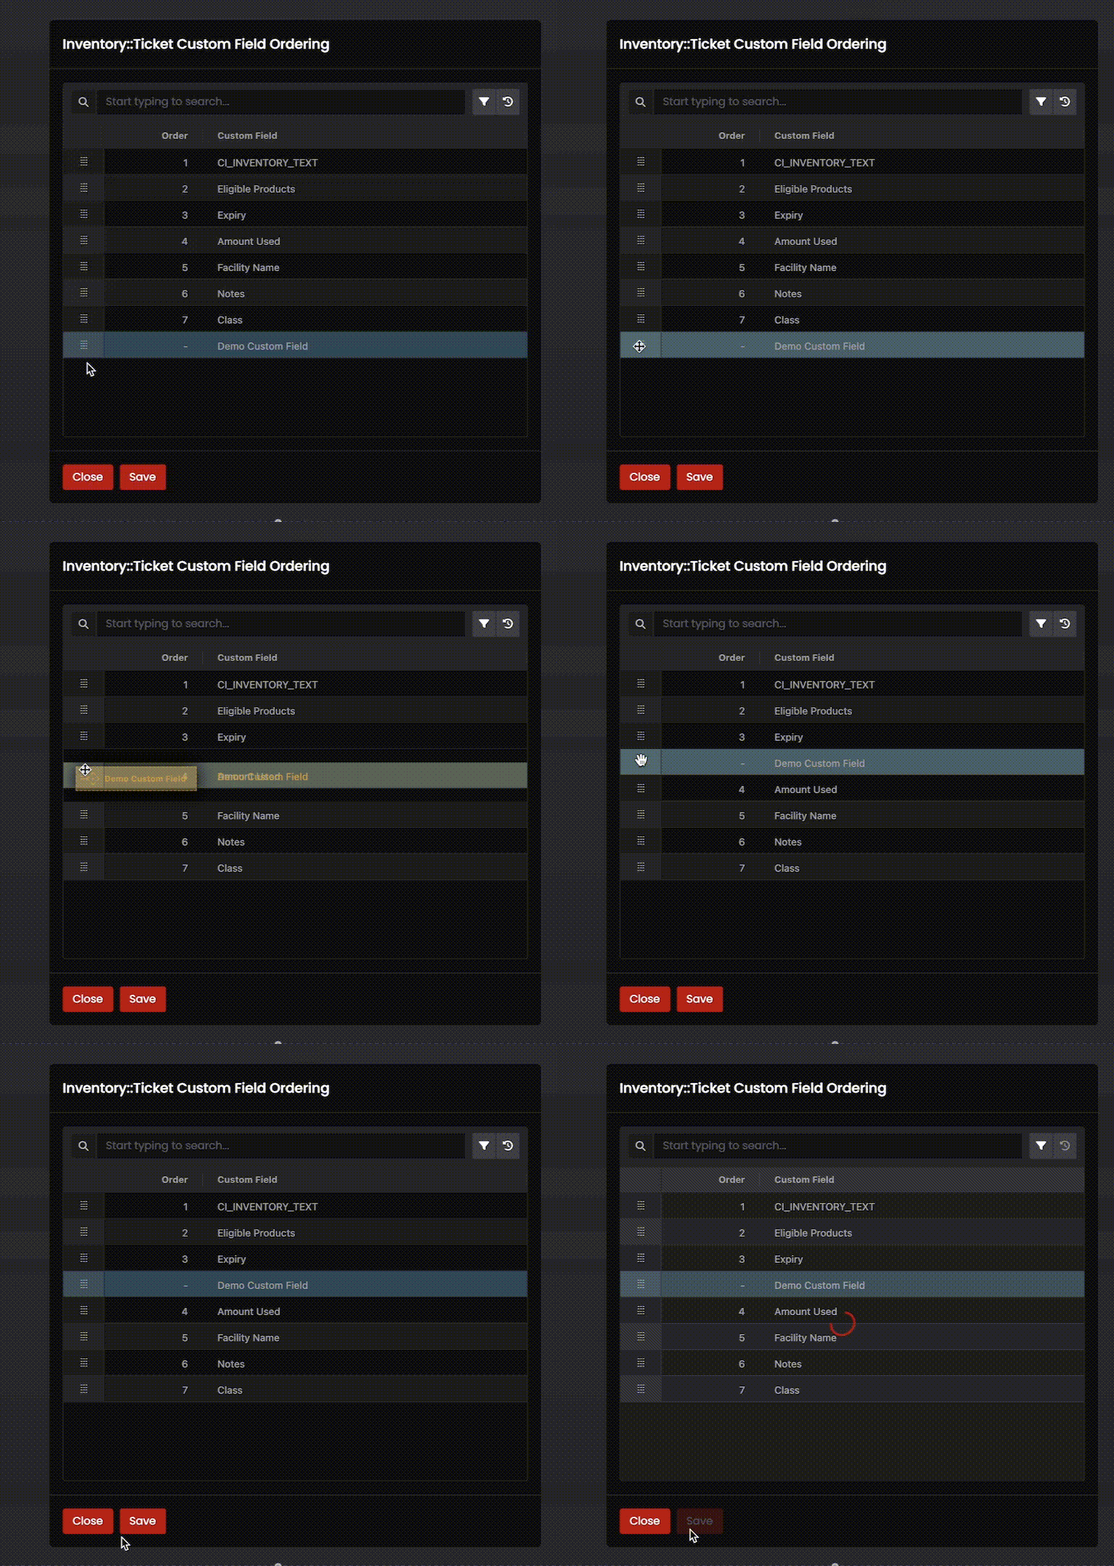
- Display Order: Set the listing order in which your custom fields will appear to your end users by clicking on the field. Then you can drag your new field from the bottom of the list to the position where you'd like it to appear to your end users.

- Required: Toggle this setting to make the field mandatory for your account users.
- Apply Values: Toggle this setting on to bulk-apply criteria for field values.

Setting Up Filters for Trades
Custom fields associated with Trades have a special feature: Filters that allow a user to specify criteria which must be met to allow a Trade to have custom fields. The filters can be based on Tags (Books) or certain Product attributes.
- Tag Filters: Restrict values to specific trade tags. Select Tag, choose tags using the radio button, and then select a tag or tags from the available list and click and click Add Filter.
- Product Filters: Limit values to specific product attributes. To add a product filter, select the Product radio button, select an attribute on which the filtering should occur, provide a value or values and click Add Filter.
- Specifying a product filter will only permit a value for the custom field if the Trade has product attributes that match the product attributes specified in the filter.
- Multiple product filters can be added for a custom field, however, only one filter can exist for each of the supported product attributes.

Configuring Recommendations for Trade Custom Fields
Custom fields associated with Trades have a special feature:
Recommendations. This allow a user to specify rules for providing a default value for custom fields. The default values can be overridden, if desired. Recommendations are made up of two components:
1. Product attributes which are used as filter criteria to determine when a recommendation should be applied and the
2. The value that should be applied as the default.
- Begin creating a recommendation by selecting filter values on any of the three product attribute inputs: Commodity, Instrument, Instrument Subtype.
- Define defaults: Enter the value to use as the field's default value. This can be done in one of two ways:
- Enter or select a value in the Value field.
- Select a related object's custom field from the Custom Field Value field to dynamically set the default value based on the value of the custom field that is selected. For example, selecting a counterparty custom field will set the value on a trade's custom field by getting the value for the counterparty custom field selected, based on the counterparty of the trade.
Ordering of recommendations is important because, in the event of multiple recommendations matching a trade's attributes, the first recommendation matched is the one that is used. Ordering can be changed by dragging and dropping.
Toggle on/off: Recommendations can be made inactive by toggling Active on and off.
Inactive Recommendations: can be automatically made inactive when changes are made to a custom field's core fields or when filters are added that invalidate a recommendation. When this is done, invalid recommendations that will be made inactive are flagged with a warning.

Applying Values in Bulk
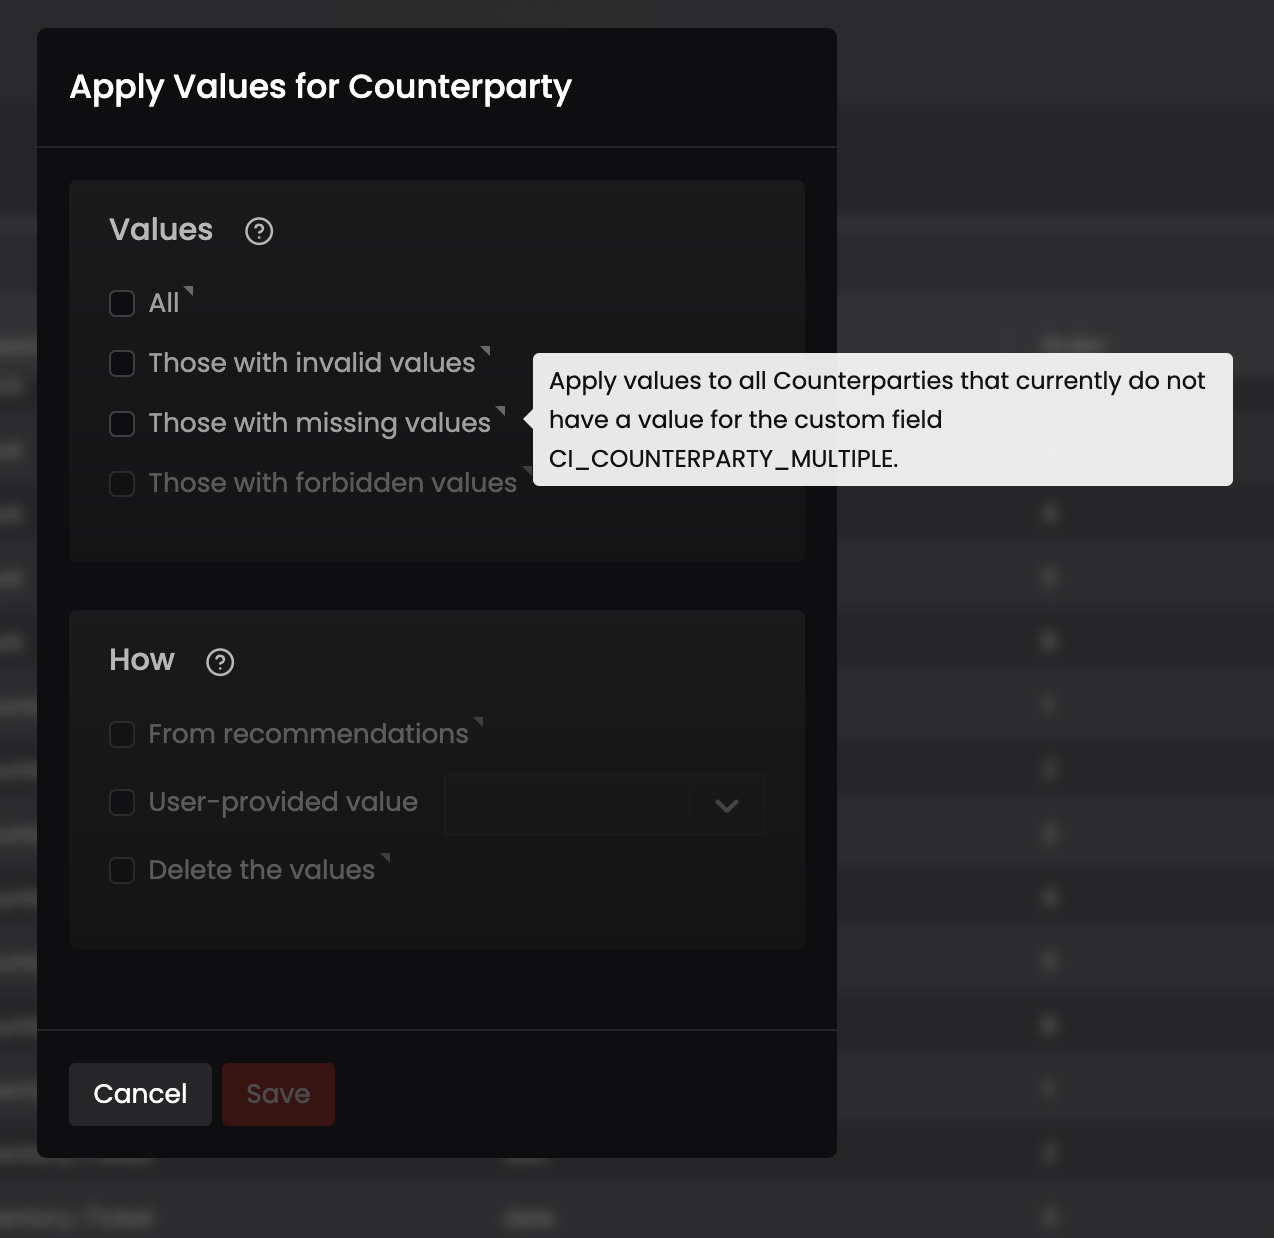
After saving the custom field, bulk updates can be performed if desired using the Apply Values option in the action menu on the Custom Fields listing page.
- Specify the objects to update:
- All: Apply to all associated objects.
- Those with invalid values: Updates all data objects of the custom field's association which have a value that is no longer valid, based on the field's current configuration. An example of how this could occur is when a choice is removed from a multiple choice custom field. Any data objects that have the removed choice as a value for the custom field would be considered to have an invalid value.
- Those with missing values: Updates all data objects of the custom field's association which currently do not have a value for the selected custom field.
- Those with forbidden values: Updates all data objects of the custom field's association which have a value but are forbidden to, based on the custom field's filter configurations. An example of how this could occur is when filters are added to a custom field. Data objects that were previously permitted to use the custom field may no longer be.

- Choose a method:
- From Recommendations: Get a value to apply to each data object based on recommendations. This only applies to trade custom fields.
- User-Provided Value: Enter a value manually.
- Delete the values: Clear existing values.

Editing, Auditing or Deleting Custom Fields
Navigate to the Custom Fields page
- Select Settings from the sidebar
- Expand Account Settings. Click on Custom Fields.

- Click the the hamburger menu just to the left of the Name field. Choose your preferred action.


